Boulder problems require a lot of different grips and techniques to conquer them. From the best climbing moves for beginners to bouldering techniques that take tons of practice to perfect, we’re here to give you our top 9 best bouldering gripping techniques. Hopefully, these will help you improve your bouldering while staying safe.
 Importance of Gripping Techniques
Understanding the best bouldering gripping techniques will help improve your bouldering ability and help minimize the chance of injury. Bouldering holds can be challenging to figure out, so knowing how to grip them is essential. By gripping on properly and using the best climbing technique, you will be able to grip onto holds for more time without feeling as tired.
Over-gripping is one of the most common mistakes to avoid with these gripping techniques. Over-gripping puts more force and energy than is necessary to hold onto the hold. This can overwork your muscles, leaving you more exhausted and more prone to injury. Try to only use the amount of force you need and not more.
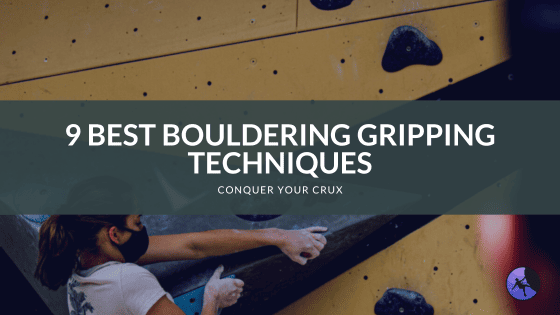
 9 Best Bouldering Gripping Techniques
Here are the nine best bouldering gripping techniques, starting with the easiest to master and leading to some of the most challenging climbing techniques. Remember to take your time when learning and practicing these grips to build up your strength without hurting yourself.
1. Jug
Instructions: A jug is the most straightforward climbing holds and is self-explanatory. Simply slip your hand into the hold and hang on. These are known to be some of the best climbing holds to come across!
Tips: Make sure you are not over-gripping on jugs. These are easy holds with an easy grip, so don’t overthink it. Save your energy for more challenging holds.
Precautions: Try to hang below the jug and keep your arms straight. This will help preserve your energy and prevent you from forcing your wrists to stay at odd angles.
2. Pocket
Instructions: A pocket is a pretty easy-to-identify hold on the wall, and the gripping technique makes perfect sense. When you come across a pocket in the hold or rock, simply fit as many fingers as you can into the pocket and hang on.
Tips: Try to fit at least your middle finger and ring finger into the pocket, as these are the strongest fingers. After those fingers, add your pointer finger, thumb, and then your pinky.
Precautions: Smaller pockets can be challenging since you’ll be hanging on only a few or sometimes even one finger. Ensure you are properly warmed up so you don’t pull any muscles.
3. Sidepull
Instructions: A side pull is a type of hold where you pull from the side and use your body weight as a counterweight to keep you on the wall. These can be challenging to figure out, but they can be extremely comfortable once you find the right body placement.
Tips: Make sure you hang back on your arm to fully weigh the side pull. This is not the kind of grip where you want to keep your body close to it. Instead, hang back on your arm and get comfortable!
Precautions: Make sure you keep your shoulders engaged! When we say to hang back on a straight arm, we don’t mean let your shoulders creep up to your ears. This is a great way to get injured, so keep your shoulders engaged.
4. Undercling
View this post on Instagram
Instructions: Similar to a side-pull, an undercling requires your body to be in the correct position to stick on the hold. In an underling, you will be standing above the hold and hanging onto the underside of the hold with your arms extending up towards your body. This position can be comfortable if you find the right body position.
Tips: Same as with the side pull, ensure you keep your shoulders engaged!
Precautions: Moving from an underlying to the next type of hold can be challenging. Ensure you are aware of your body and maintain a good body position as you come out of the underlying so you don’t pop off the wall.
5. Pinch
Instructions: A pinch is a pinch! All you are doing is pinching a hold sticking out from the wall. Pinches can range in size from tiny to needing your whole hand. Either way, keep your fingers and thumb pinching the hold to keep a grip.
Tips: It is essential not to overgrip on pinches, but it can be really easy to fall into the pattern of overgripping on pinches. Pay attention to how tight you are gripping, and practice on a low-to-the-ground pinch to ensure you have the right tension.
Precautions: Over gripping on pinches can be bad for your wrist. Try to focus on finding texture on the rock or hold to help you hold on and minimize how strongly you are gripping.
6. Crimp
View this post on Instagram
Instructions: Crimps are classic bouldering grips where you put your fingers on a small ledge and wrap your thumb over them to keep your fingers in place. Leaving your thumb off the crimp will make it an open crimp, but by placing your thumb on top of your fingers, you create a closed crimp, which is much stronger.
Tips: Practice, practice, practice crimps! You will find crimps on so many boulder problems that they will be essential to your success. Get as many of your fingers on a crimp to give yourself the best chance of staying on.
Precautions: It can be really easy to slice up your fingers by falling off a crimp since many crimps have sharp edges. Be aware of how you are moving off a crimp to help prevent slips from happening.
7. Sloper
View this post on Instagram
Instructions: Slopers are the bane of many climbers, especially those who climb on smooth or slippery rocks. A sloper is a large round hole you grip with an open hand. You aim to get as much surface area as possible on your hand, creating friction on the sloper.
Tips: The key to using slopers successfully is body position. If you try to stand up and grip a sloper that is directly in front of your shoulders, you will fall. Try lowering your center of gravity and hanging below the sloper to weight your hand until you need to move.
Precautions: Although slopers don’t take much bouldering grip strength, they can require some odd body positions. Be cautious when moving into or out of a sloper so your body doesn’t slip off.
8. Gaston
View this post on Instagram
Instructions: Gastons are not climbing moves for beginners! These grips can be challenging and take a toll on your shoulders if not done properly. Think of Gaston as pulling open an elevator door that is closing. It’s an outward pushing motion, usually with your thumbs facing down toward the ground. This is a two-handed grip that requires opposing pressure to stay on the wall.
Tips: Make sure you keep your shoulders engaged and are properly warmed up before trying a Gaston.
Precautions: Gastons can be wobbly when getting into and out of the grip. Keep your body in control and moving slowly so you minimize the chance of hurting your shoulder on this challenging move.
9. Dyno
View this post on Instagram
Instructions: Dynos, or dynamic climbing moves, are popular in bouldering but can be challenging. They involve jumping from one hold to another and put you at risk of high-impact falls every time. They are also a quick and efficient way to climb if you’re good at them!
Tips: Practice dynos in a controlled way. Either practice on a rope so the fall will be softer, or practice over a good pad until you are confident in your dynos. Doubting yourself is a great way to fall when dynoing.
Precautions: Dynos can be hard on your joints, so don’t do them too much. Falling from dynos is also how many climbers injure their ankles, so if you already have bad ankles, you may want to steer clear of dynos.